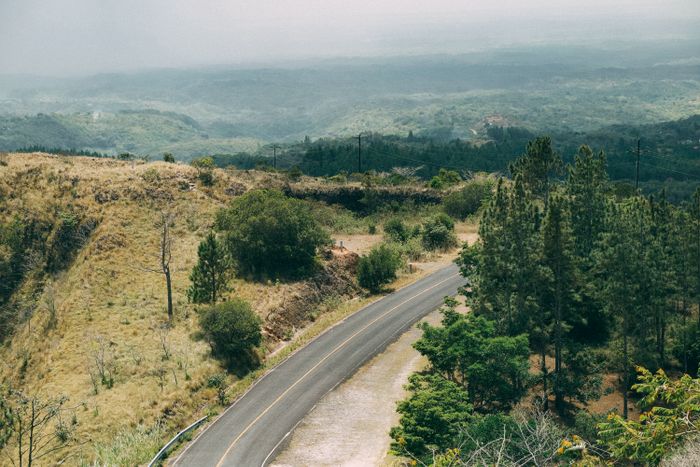
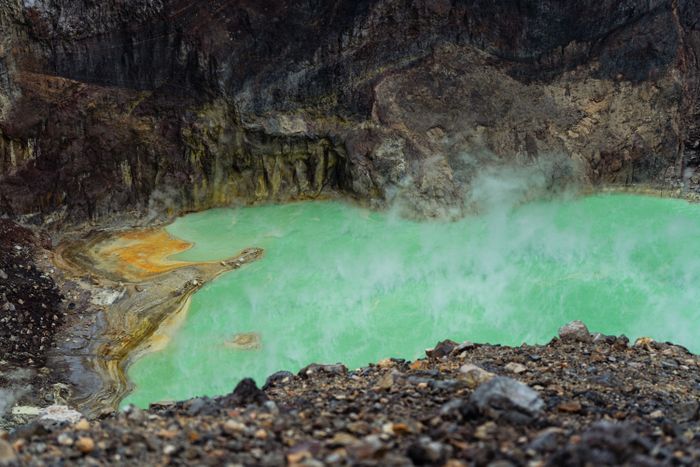
At 3,474 metres above sea level, Volcán Barú is the highest point in Panama and one of the few places on Earth where, on a clear morning, you can watch the sun rise over the Caribbean while the Pacific glitters to the south. The hike from Boquete is 13.5 km of relentless uphill on a jeep track — no technical climbing, no ropes, no trail-finding — just lung-burning altitude gain through cloud forest and volcanic rock. Most people do it at night. Most people find it harder than they expected. Almost everyone says it was worth it.
This guide covers what the other write-ups skip: the exact departure window you need to hit sunrise (not just "leave at midnight"), how to read the odds of actually seeing both oceans, where the trail bites hardest, what gear fails and why, and how to budget the whole thing from Boquete door to summit cross and back. If you are planning to spend a few days in Boquete, the Barú hike belongs at the top of your list — but it deserves honest preparation.
Section 01Why climb Volcán Barú
Panama is a narrow country — at its slimmest, just 80 km separates the two oceans. Barú sits almost perfectly centred between them, and its summit at 3,474 m clears the surrounding ridgelines enough that, in theory, both coastlines are visible simultaneously. That geographical accident makes it genuinely rare: fewer than a handful of summits on the planet offer a confirmed two-ocean view, and Barú is the most accessible of them.

Beyond the postcard claim, the mountain itself is compelling. The Boquete route climbs through three distinct vegetation zones: a lower belt of dense cloud forest where quetzals nest from February through April, a mid-elevation zone of dwarf forest draped in moss and bromeliads, and a stark upper section of volcanic rock and páramo grassland above 3,000 m. The transition happens fast enough that you notice it even in the dark. By the time you reach the summit plateau — marked by radio towers, a wooden cross, and a cluster of exhausted hikers — you are standing above the clouds on most mornings, watching two weather systems play out below you.
Volcán Barú last erupted roughly 500 years ago and is classified as dormant, not extinct. The national park protecting it — Parque Nacional Volcán Barú — covers 14,300 hectares and forms part of the La Amistad International Park, a UNESCO World Heritage site shared with Costa Rica. The biodiversity here is extraordinary: over 400 bird species have been recorded in the park, and the resplendent quetzal is reliably seen on the lower trail in nesting season.
Section 02The two-ocean question — honest odds
Every guide mentions the two-ocean view. Very few tell you how often it actually happens. The honest answer: on the Boquete side, you are looking at a realistic success rate of around 20–30% for a clear, simultaneous view of both oceans, even in dry season. Here is why, and how to maximise your chances.

The Pacific side (to the south and southwest) is almost always visible from the summit during the dry season — December through April — because the trade winds push moisture north and east, leaving the Pacific slopes relatively clear. The Caribbean side (to the north) is the problem. The Atlantic-facing slopes of the Cordillera receive rainfall year-round, and low cloud typically sits over the Caribbean lowlands even on otherwise clear days. The two-ocean view requires an unusually dry, high-pressure morning on the Caribbean side, which happens most reliably in January and February and is rare outside those months.
What you can count on, regardless of Caribbean visibility: standing above a sea of clouds at sunrise, watching the Pacific horizon light up in shades of orange and pink, with the Chiriquí lowlands and Gulf of Chiriquí visible below. That alone — being above the clouds at 3,474 m as the sun clears the horizon — is the experience most hikers describe as life-changing. The two-ocean view is the bonus, not the baseline.
Practical tip: check the Mountain Forecast website (mountain-forecast.com, search "Volcan Baru") three to four days before your planned hike. Look for a forecast showing less than 20% cloud cover at the 3,500 m level and low humidity on the north face. A clear forecast on the day before is your best predictor. Do not rely on Boquete town weather — the summit can be socked in while the valley is sunny, and vice versa.
Section 03Route options — Boquete vs. Los Llanos
There are two established routes to the summit of Volcán Barú. The vast majority of international hikers use the Boquete (eastern) route. The Los Llanos route, ascending the western flank from near the town of Volcán, is a genuinely different experience — wilder, steeper, and far less trafficked — but requires more planning and is rarely covered in detail.

| Route | Distance | Elevation gain | Time (up) | Verdict |
|---|---|---|---|---|
| Boquete (east) | 13.5 km one-way | ~1,900 m | 5–8 hrs | Recommended |
| Los Llanos (west) | ~12 km one-way | ~2,000 m | 6–9 hrs | Experienced only |
| 4×4 jeep (Boquete) | 13.5 km one-way | 1,900 m | ~2 hrs | Non-hikers |
The Boquete route
The trailhead is at the Volcán Barú National Park ranger station, roughly 7 km above Boquete town on the road through the Alto Chiquero neighbourhood. The route follows a single jeep track — wide enough for 4×4 vehicles — all the way to the summit. You cannot get lost. Distance markers appear every 1–2 km, showing both distance covered and altitude. The track is loose volcanic rock and compacted dirt in dry season, churned mud in wet season. The gradient is relentless but rarely brutal: most of the climb averages 140–150 m of elevation gain per kilometre, with the steepest pitches concentrated between kilometres 8 and 11 (see pacing section below).
The Los Llanos route
Starting from the Los Llanos area near Volcán town, this trail climbs the western flank through a sequence of ecosystems that the Boquete route does not show you: open savannah with agave and cedar at the base, transitioning through humid forest with Cecropia trees, then into a moss-laden cloud forest with endemic orchids, and finally onto the rocky summit plateau. The vegetation diversity is significantly richer than the eastern approach. The trail is narrower, less maintained, and requires a guide — navigation is genuinely difficult in the upper sections, and the descent is steep enough that a wrong turn in cloud can be serious. Budget 6–9 hours up, and arrange transport from Volcán town (roughly 1.5 hours from Boquete by road). If you are an experienced hiker with a local guide and at least two days to spare, the Los Llanos route is the more rewarding ascent. For most visitors on a single-night trip, the Boquete route is the right call.
The 4×4 jeep option
Several operators in Boquete run pre-dawn 4×4 trips to the summit, departing around 3:00–3:30 a.m. and arriving at the top for sunrise. Cost is typically $120–$150 per person, including transport and a bilingual guide. The ride takes roughly two hours each way on the same jeep track hikers use — rough, steep, and genuinely exciting in its own right. This is the right choice if you have limited time, mobility concerns, or simply want the summit experience without the 11-hour physical commitment. The view from the top is identical.
Three rides. One unforgettable Boquete.
Premium Orbea e-bikes that do the climbing for you. Helmet, gloves, water and route support included — and you pay when you arrive.
Coffee Farm E-Bike Tour
Ride to a working farm and see how Geisha — the world's most expensive coffee — is made. Tasting at Altieri Specialty Coffee, geisha ice cream included.
Guided Highlights Ride
Lost Waterfalls, Library Park and the highland viewpoints locals love — the spots most visitors never find.
Self-Paced Rental
Hourly or full-day. Take a recommended route or just wander. The e-bike means hills don't decide your day.
Section 04Elevation profile and pacing strategy
The Boquete route gains approximately 1,900 metres over 13.5 kilometres. That is a steep average, but the gradient is not uniform — understanding where the hard sections fall lets you pace yourself intelligently on a midnight start when fatigue compounds quickly.

Km 0–2 (1,600–1,800 m): The trail begins at the ranger station at roughly 1,600 m. The first two kilometres climb steadily through cloud forest on a well-graded track. This is your warmup. The air is cool but not cold. Pace yourself conservatively here — the temptation to move fast in the relative comfort of the lower forest is the most common pacing mistake. Target 2.5–3 km/h.
Km 2–5 (1,800–2,200 m): The gradient eases slightly through a mid-elevation zone of dense mossy forest. Distance markers become your psychological anchors. This section is where most hikers find their rhythm. The track is often muddy even in dry season due to cloud condensation. Expect some ankle-deep patches. Pace: 2–2.5 km/h.
Km 5–8 (2,200–2,700 m): The vegetation begins to thin and open views appear to the south and east. You will start to feel the altitude here — breathing becomes noticeably harder above 2,500 m, and your pace will naturally slow. Do not fight it. This is also where the track surface changes: looser volcanic gravel replaces compacted dirt, and footing becomes less predictable. Pace: 1.5–2 km/h.
Km 8–11 (2,700–3,200 m): The steepest sustained section of the hike. The gradient averages 175–200 m per kilometre here, and the loose scree makes every step slightly inefficient. This is where unprepared hikers bonk. Short breaks every 20–25 minutes are more effective than pushing through. The dwarf forest gives way entirely to open páramo and volcanic rock. Wind picks up significantly. Put on your insulating layer before you need it — once you are cold and stopped, it is much harder to rewarm. Pace: 1–1.5 km/h.
Km 11–13.5 (3,200–3,474 m): The final push to the summit plateau. The gradient eases slightly but altitude is now the dominant factor. Many hikers experience mild headaches or dizziness in this section. The radio towers become visible from about km 12 and serve as a powerful motivator. The summit plateau is broad and flat, marked by the towers, a wooden cross, and a small shelter. Pace: 0.8–1.2 km/h.
Section 05Midnight-start timing — the exact numbers
Every guide says "leave around midnight." Here is the actual calculation, because getting the timing wrong means either waiting an hour in sub-zero wind at the summit or missing sunrise entirely.

Sunrise in Boquete varies from about 6:10 a.m. (December) to 6:35 a.m. (June). During the prime hiking window of December through April, target 6:10–6:25 a.m. as your summit arrival time. You want to arrive 20–30 minutes before sunrise — enough time to find a good vantage point and layer up, but not so early that you are standing in the dark and cold for an hour.
Working backwards: if you are an average-fitness hiker, budget 6.5–7.5 hours for the ascent. That puts your departure time at 11:00–11:45 p.m. If you are very fit and move fast, budget 5.5–6 hours and depart at midnight. If you have any doubt about your fitness or have not done a significant hike recently, depart at 10:30–11:00 p.m. and plan to take longer breaks in the upper section rather than rushing the final kilometres in the cold.
The shuttle from Hostel Mamallena and other Boquete hostels typically departs at 11:00–11:30 p.m. and drops hikers at the park entrance road junction, about 1 km below the ranger station. Add 15–20 minutes of walking to reach the ranger station itself. Factor this in: if the shuttle leaves at 11:15 p.m. and drops you at 11:45 p.m., you are not starting the timed hike until midnight. For a 6:15 a.m. sunrise, that gives you 6 hours and 15 minutes — tight for anyone who is not a strong hiker.
The practical recommendation: if you are using a shuttle, aim for the earliest available departure (some operators offer 10:30–11:00 p.m. pickups on request). If you are taking a private taxi, negotiate an 11:00 p.m. pickup from your accommodation and ask to be dropped at the ranger station itself, not the road junction. A taxi from central Boquete to the ranger station costs approximately $10–15 and is well worth the extra kilometre it saves.
Section 06Gear that actually works — and what fails
The gear failures on Volcán Barú are predictable, and they follow specific patterns. Here is what goes wrong and why.

Footwear: Running shoes fail on the upper section (km 8–13.5) for two reasons. First, the loose volcanic scree provides no lateral ankle support, and rolled ankles are the most common injury on this trail. Second, the thin soles of trail runners transmit every sharp rock edge to your foot, and after six hours of climbing, that becomes genuinely painful. Waterproof hiking boots with ankle support are the correct choice. If you only have trail runners, they will get you up — but expect sore feet and take extra care on the scree. Do not attempt this hike in sandals or casual shoes.
Layering: The summit temperature at pre-dawn is typically 0–5°C, with wind chill pushing it to -5°C or colder. The mistake most hikers make is wearing too much at the bottom and not enough at the top. You will be sweating heavily through km 1–8; if you wear a heavy jacket from the start, it will be soaked with sweat by the time you need warmth at altitude. The correct system: moisture-wicking base layer, light mid-layer (fleece or softshell) that you can stow in your pack, and a windproof/waterproof outer shell that stays in your pack until km 8–9. Add a wool or synthetic hat and gloves at the same point. Bring a dedicated summit layer — a down or synthetic puffy jacket — that you put on only when you stop moving at the top.
Cotton kills: A cotton t-shirt worn as a base layer will be soaked within the first two kilometres and will actively cool you in the upper section. Merino wool or synthetic moisture-wicking fabric only.
Headlamps: Bring two. A dead headlamp at km 6 in the dark is not a minor inconvenience — it is a trip-ending problem. Use a primary headlamp with fresh batteries and carry a backup. Headlamps with a red-light mode are useful for preserving night vision when you want to look at the stars without blinding your hiking companions.
Water: There is no water source on the trail. Carry a minimum of 2.5 litres per person. At altitude, you dehydrate faster than you feel thirsty — drink on a schedule, not when you feel dry. Electrolyte tablets or powder are worth adding to at least one litre.
Food: High-calorie, easy-to-eat snacks. Sandwiches, energy bars, nuts, chocolate. Avoid anything that requires preparation. Your appetite may be suppressed by altitude in the upper section — eat anyway, on a schedule.
Trekking poles: Optional on the ascent, highly recommended for the descent. The loose gravel on the upper section is significantly harder on knees going downhill. Collapsible poles that fit in your pack are ideal.
Section 07Permits, fees, and the real cost breakdown
The total cost of hiking Volcán Barú independently is lower than most guides suggest — but there are fees that catch people by surprise. Here is the complete picture.

| Item | Cost (USD) | Notes |
|---|---|---|
| Park entrance fee | $5 per person | Payable at ranger station or via SINAP online |
| Shuttle (hostel-organised) | $5–$20 per person | $5 with 4+ people; $20 solo. Mamallena Hostel and others offer this |
| Private taxi (one-way) | $10–$15 | To ranger station; negotiate in advance |
| Return taxi (shared) | $3–$5 per person | Schedule pickup for ~noon; share with other hikers |
| Guide (optional) | $40–$80 | Per group for Boquete route; higher for Los Llanos |
| Guided hiking tour | $60–$90 per person | Includes transport, guide, and park fee |
| 4×4 jeep tour | $120–$150 per person | Includes transport, guide, park fee, and breakfast |
Independent budget total: $13–$25 per person (entrance fee + shared shuttle or taxi). This is the cheapest legitimate option and is entirely feasible for fit, experienced hikers.
Guided hike total: $65–$100 per person, all-in. Worth it for first-timers, solo travellers, or anyone uncertain about the altitude or navigation.
Hidden costs to budget for: A meal and hot drink in Boquete before and after the hike ($8–$15 total), any gear you need to buy or rent in town (Boquete has limited gear shops — bring what you need from home or David), and an extra night's accommodation if you need a recovery day.
Section 08Altitude sickness — real risk at 3,474 m
Volcán Barú sits at 3,474 m — high enough for acute mountain sickness (AMS) to be a genuine concern, particularly for hikers arriving from sea level in Panama City (which sits at essentially 0 m). Most visitors do not spend any acclimatisation time in Boquete before attempting the summit, which increases risk.

AMS typically begins above 2,500 m and presents as headache, nausea, fatigue, dizziness, and loss of appetite. Mild AMS is common on the upper section of the Barú trail — a dull headache above km 10 is experienced by a significant proportion of hikers and is not cause for alarm on its own. Moderate AMS — persistent headache, vomiting, difficulty walking straight — requires descent immediately. Do not push through moderate AMS symptoms hoping they will resolve at altitude. They will not.
Mitigation strategies specific to Barú: spend at least one full day in Boquete (1,600 m) before attempting the summit. This is not full acclimatisation, but it is meaningfully better than arriving from Panama City and hiking the same night. Stay well hydrated in the 24 hours before the hike. Avoid alcohol the day before. Move slowly on the upper section — the most common AMS trigger on this trail is pushing pace above 3,000 m. Ibuprofen can help with altitude headache; acetazolamide (Diamox) requires a prescription but is effective prophylactically for those with a history of AMS.
The descent from the summit to Boquete is the treatment for AMS. If symptoms are worsening, turn around. The jeep track is straightforward to descend even in cloud, and losing 500 m of altitude typically resolves mild to moderate symptoms within an hour.
Section 09Guided vs. independent — which is right for you
The Boquete route does not require a guide for navigation — it is a single jeep track with distance markers every 1–2 km. You cannot get lost. That said, there are good reasons to hire one, and the decision depends on your experience and circumstances.
Go independent if: You have previous high-altitude hiking experience (above 3,000 m), you are hiking with at least one other person, you have the correct gear, and you are comfortable managing your own pacing and turnaround decisions. The trail is well-marked, the distance markers are motivating, and the experience of arriving at the summit under your own power is genuinely satisfying.
Hire a guide if: You are a solo hiker (safety and logistics), you have no experience above 2,500 m, you want to learn about the ecology and geology of the park, or you are attempting the Los Llanos route (where a guide is effectively mandatory). A good guide will also manage your pacing, recognise early AMS symptoms, and handle the logistics of transport and permits.
Several reputable operators in Boquete run guided sunrise hikes: Boquete Outdoor Adventures, Boquete Tree Trek, and Chiriquí River Rafting all have established Barú programs. Expect to pay $60–$90 per person for a guided hike including transport and park fee. Book at least 48 hours in advance during high season (December–March), when spots fill quickly.
For the 4×4 jeep option, Panama Bubble Trips and Boquete Outdoor Adventures are well-reviewed operators. Prices run $120–$150 per person with breakfast included at the summit.
Section 10Where to stay in Boquete before and after
Boquete is a small highland town of around 25,000 people, sitting at 1,600 m in the Caldera River valley. It has a well-developed tourist infrastructure for its size, with options across every budget. The town itself is the base for the Barú hike — everything you need is within walking distance of the central plaza.
Budget ($15–$35/night): Hostel Mamallena is the de facto hiker hub — they organise the popular shuttle service to the trailhead and have a common room full of people comparing notes on the hike. Boho by Arte Hostal is a newer, more design-conscious option with private rooms at hostel prices. Both are within a few blocks of the plaza.
Mid-range ($60–$120/night): Boquete Garden Inn is a consistently well-reviewed property with comfortable rooms and a garden setting. Hotel Ladera and Casa de Montaña are solid alternatives with mountain views and helpful staff who can assist with hike logistics.
Upscale ($150+/night): Valle Escondido Wellness Resort is the standout luxury option, with spa facilities that become extremely appealing after 27 km of volcanic trail. Finca Lerida — a working coffee farm with rooms — offers a quieter, more immersive experience and is close to the park entrance.
Book accommodation at least a week ahead during December–March. The town fills up quickly over Christmas and New Year, and the combination of expat retirees, birding tourists, and hikers creates genuine demand.
Section 11The day after — recovery in Boquete
After 27 km and 1,900 m of elevation gain, your legs will know about it. The day after the Barú hike is a recovery day by necessity — and Boquete is an excellent place to spend one. The town's coffee culture, flower farms, and river walks are all low-effort and genuinely rewarding.
The most popular recovery activity is a coffee farm tour. Boquete sits in the heart of Panama's premier coffee-growing region, and farms like Finca Lerida, Kotowa, and Don Tito offer guided tours that explain the full process from cherry to cup, ending with a cupping session. Most tours run two to three hours and cost $20–$35 per person — the kind of gentle morning that aching quads can handle.
For something slightly more active without the punishment of another big climb, an e-bike tour through the valley is a genuinely good option. E-Valley Bikes runs guided and self-guided e-bike tours around Boquete and the surrounding coffee farms — the electric assist takes the sting out of the valley's rolling terrain, and you cover ground that would take a full day on foot in a relaxed two to three hours. It is a perfect pairing with the Barú summit: one day of maximum effort, one day of effortless exploration.
The Boquete river walk along the Caldera River is free, flat, and beautiful — a 3–4 km path through the valley floor that passes flower farms and small fincas. The Saturday farmers' market (Feria de las Flores y del Café) runs from 6:00 a.m. and is worth an early visit for local produce, coffee, and breakfast. And if your legs have completely given up, the hot springs at Pozos Termales de Caldera are a 45-minute drive from Boquete and offer the kind of volcanic warmth that makes post-hike soreness feel almost pleasant.